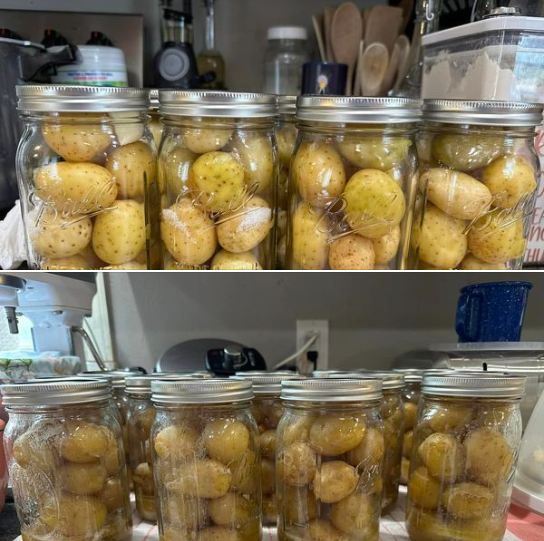
Canning mini potatoes at home is a fantastic way to preserve them while maintaining their texture and flavor. This guide will walk you through the process of canning mini potatoes using a pressure canner, as this is necessary for low-acid vegetables to ensure food safety.
Ingredients
- Mini potatoes (as many as you’d like to can, but ensure they are fresh and of similar size for even cooking)
Equipment
- Pressure canner
- Canning jars (pint or quart size), lids, and bands
- Large pot
- Jar lifter
- Canning funnel
- Knife or vegetable peeler (if peeling)
- Large bowl
- Clean cloth or paper towels
Preparation
- Prepare the Potatoes:
- Wash the potatoes thoroughly to remove any dirt. You can peel them if you prefer, but it’s common to can them with the skins on, especially mini potatoes, as the skins are thin.
- If any potatoes are larger than others, cut them to ensure all are about the same size.
- Sterilize Your Jars and Lids:
- Though modern guidelines state that sterilization of jars is not necessary for pressure canning (as the process itself will sterilize them), it’s a good practice to start with clean equipment. Wash jars, lids, and rings in soapy water and rinse well.
Blanching the Potatoes
- Blanch the Potatoes:
- Place the potatoes in a large pot of boiling water. Blanch them for about 10 minutes. Blanching helps to cleanse the surface of the potatoes, reduce spoilage microbes, and brighten their color.
Canning Process
- Pack the Potatoes:
- Use a canning funnel to pack the hot, blanched potatoes into the jars, leaving 1-inch headspace.
- Add Boiling Water:
- Pour boiling water over the potatoes, maintaining the 1-inch headspace. The water should cover the potatoes completely.
- Remove Air Bubbles:
- Slide a non-metallic utensil (like a spatula) down the sides of the jar to remove air bubbles. Adjust the headspace if necessary after removing air bubbles.
- Wipe and Seal the Jars:
- Wipe the rims of the jars with a clean damp cloth to ensure there is no residue that could interfere with the seal. Place the lids on the jars and screw on the bands until they are fingertip tight.
- Process in a Pressure Canner:
- Process pint jars for 35 minutes and quart jars for 40 minutes at 10 pounds of pressure (adjust pressure for your altitude if above 1,000 feet).
- Cooling the Jars:
- After processing, turn off the heat and allow the pressure canner to cool down naturally. Once the pressure has normalized, remove the jars using a jar lifter and place them on a towel or cooling rack. Let them cool undisturbed for 24 hours.
- Check Seals:
- Check that the lids have sealed by pressing down in the center of each lid. If the lid does not move up and down, it is sealed.
- Label and Store:
- Label your jars with the content and canning date. Store them in a cool, dark place. Properly canned potatoes should be good for at least a year.
Tips
- Altitude Adjustments: Remember to adjust the pressure on your canner if you live at an altitude above 1,000 feet.
- Inspect Potatoes: Before canning, ensure that all potatoes are healthy, with no soft spots or blemishes.
This method of canning mini potatoes will help you preserve them for a long time, making them a handy and delicious addition to your pantry!