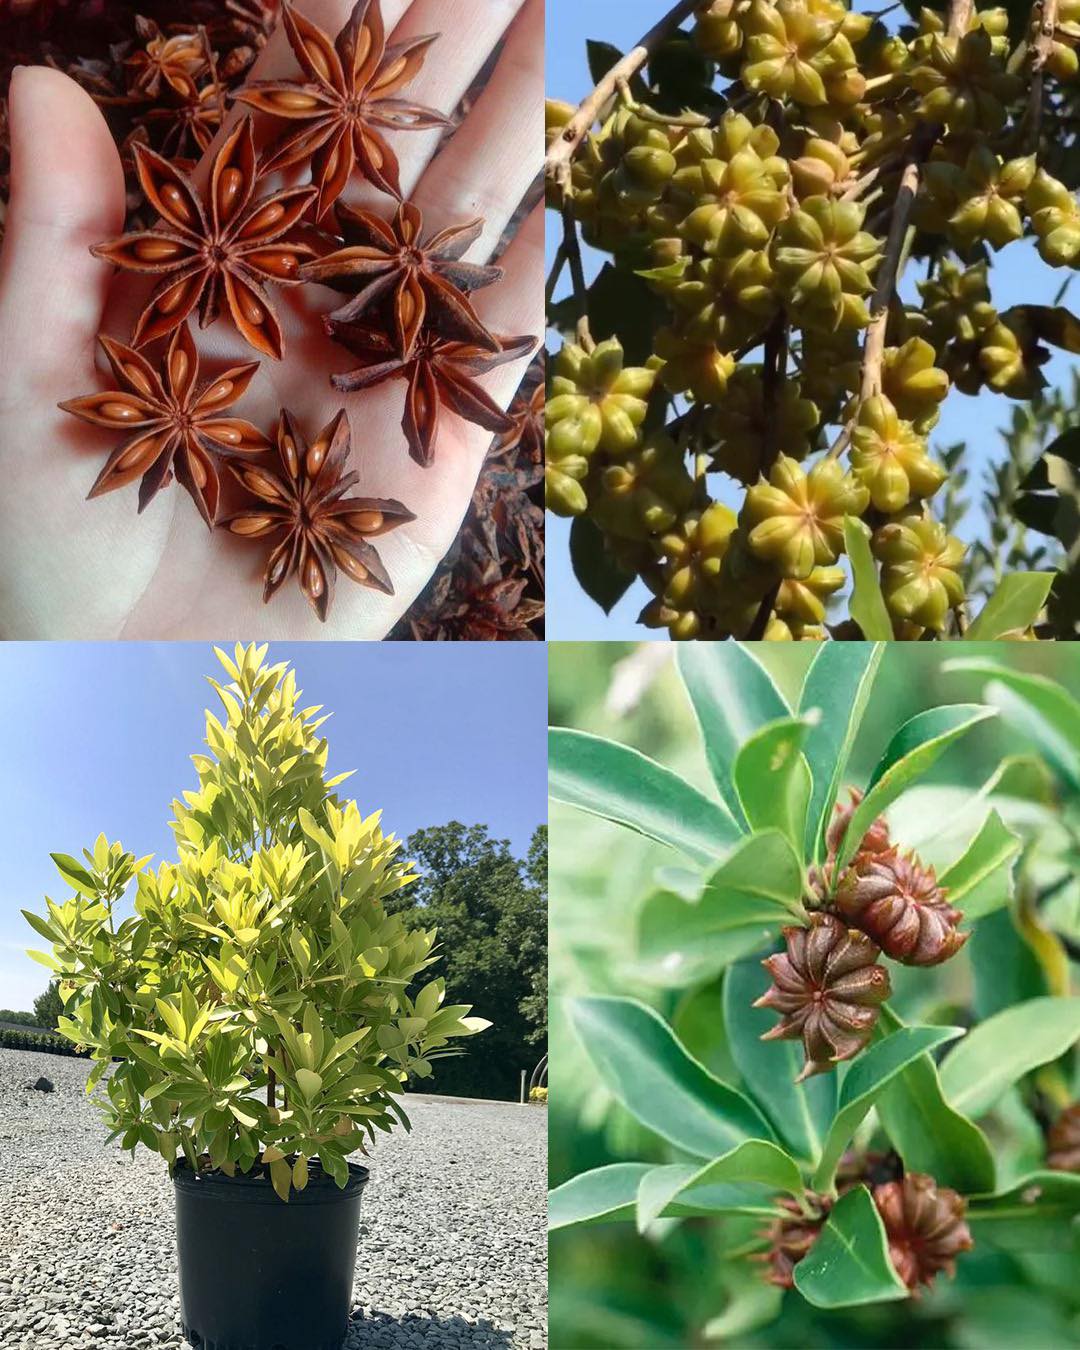
Growing star anise (Illicium verum) in containers is an engaging yet challenging endeavor suited for gardeners looking to expand their spice cultivation repertoire. Known for its unique star-shaped fruit and licorice-like flavor, star anise primarily thrives in China and Vietnam. However, with the right care and conditions, you can successfully grow this aromatic spice at home. Follow this detailed guide to nurture your own star anise from seed to spice.
Step 1: Sourcing Your Seeds
Freshness is crucial for star anise seeds as older seeds exhibit poor germination rates. Source your seeds from reputable suppliers or specialty garden stores. Alternatively, beginning with a young sapling can simplify the initial growing process.
Step 2: Choosing the Right Container
Since star anise trees can grow quite large, it’s essential to select a container that can accommodate their size. Opt for a pot that is at least 18-24 inches deep and wide, ensuring it has excellent drainage to avoid waterlogging.
Step 3: Soil and Location
Fill your container with a high-quality, well-draining potting mix, ideally with a slightly acidic to neutral pH (6-7). Place the container in an area that receives partial shade to protect the plant from harsh afternoon sunlight.
Step 4: Planting
If you’re starting with seeds, plant them just below the soil surface and keep the soil consistently moist but not soggy. Germination is typically slow and may take several weeks. For saplings, ensure they are securely planted at the same depth they were growing at previously.
Step 5: Watering and Humidity
Star anise plants need steady moisture and high humidity. Water deeply when the top inch of soil becomes dry. To maintain ideal humidity, place a humidity tray beneath the container or use a room humidifier during dry months.
Step 6: Feeding
Use a balanced, slow-release fertilizer rich in nitrogen to nourish your star anise. Apply fertilizer early in the growing season and again in mid-summer to support robust growth and fruit development.
Step 7: Pruning and Care
During the dormant season, prune the star anise tree to manage its size and encourage a fuller, bushier appearance. Regularly remove any dead or unhealthy branches and shape the tree to your preference.
Step 8: Overcoming Challenges
Patience is key with star anise, as it grows slowly and may take years to begin fruiting. Be vigilant for common pests such as aphids and spider mites, treating infestations with organic pesticides to keep the plant healthy and safe for spice production.
Step 9: Harvesting
The fruits of the star anise are ready for harvest when they turn reddish-brown and begin to open slightly. Carefully cut the whole star from the tree and allow it to dry in a cool, dark place.
Step 10: Storing
Once fully dried, store your star anise in an airtight container in a cool, dark location. When stored properly, star anise can maintain its aromatic flavor for up to one year.
Growing star anise in containers is not just about adding flavor to your dishes; it’s about embracing the beauty and challenge of cultivating an exotic spice. Enjoy the distinctive taste and aroma of your home-grown star anise in various culinary creations!